Road Trips and Tiny Trailers
All you need for planning the best road trips in your tiny trailer!
A COMPACT CAMERA AT ITS BEST
Oh, the Eternal Question…
 “Do I really want to lug around a bunch of equipment on my next trip and therefore risk getting A.A.S (“Accessory Acquisition Syndrome”)?
OR
“Do I want to settle for lesser quality photos?”
For those of us who want to make the best of our compact camera, there is so much we can do to make the most of our travel photos!

Here is a shot taken by my husband, Eddie, with his fancy DSLR in Little Rock, which really made me want to upgrade…
But then here are 2 shots I took on the same trip with my Panasonic Lumix!

Although a compact camera (no matter what you paid) can’t really compare with the quality of an DSLR, with a few pointers and some basic Photoshop skills, there’s no reason to be unhappy with the photos you bring back with you from your road trips!
Follow these simple guidelines, and you’ll be surprised at how good your photos can be!
(All the example photos shown here were taken with my Lumix point-and-shoot.)
*********************************************
Before we start, though, let’s first understand the ‘3-legged stool’ of digital photography:
ISO * APERTURE * SHUTTER SPEED
This stuff gets very confusing, but a compact user can rest with knowing just the basics:
ISO = Measures the sensitivity of the image sensor. Simply put, higher numbers mean your sensor becomes more sensitive to light which allows you to use your camera in darker situations. The cost of doing so could be more grain or noise. An ISO number of 100-200 is considered ‘normal’.
APERTURE = The size of the opening in the lens that is created when the camera takes it’s picture. The opening is measured in F-Stops and ranges from approx 1.4 to around 22. The larger the F-Stop number, the smaller the opening is, the less light is let in and the clearer the background will be. The smaller the F-Stop number, the larger the opening, the more light is let in and the blurrier the background becomes.
SHUTTER SPEED = The amount of time that the camera’s shutter stays open. A ‘normal’ speed is around 1/60th or more. Anything slower and you’ll need a tripod. The faster your subject is moving, the higher your shutter speed needs to be. A bird’s wing will probably need about 1/1000th shutter speed to catch it without a blur, and a really slow shutter speed, say 1/3rd will give you that velvet look as water flows.
For the most part, a compact camera is pretty limited here, and AUTO is a great mode to work in (It picks all 3 settings for you). If you do want to get a little creative, look at your camera’s dial. The ‘A’ setting will give you control of the Aperture (F-Stop) and automatically control the ISO & Shutter Speed for you. The ‘S’ setting will give you control of the Shutter speed while automatically controlling the ISO & Aperture.
If you go to ‘M’ (Manual) or ‘P’ (Programmed) mode and get good at that those you really need to get yourself a DSLR….
*********************************************
Ok! So here we go…
1). KNOW WHAT YOUR CAMERA CANNOT DO:
*The image sensor in a compact is considerably smaller than the ones in a DSLR, therefore you’ll never get the same image quality as with a DSLR. So, Keep your expectations reasonable and don’t try and blow your photos up too much. For an online photo album, or photo storage on your computer, you won’t need to blow the photo up to a poster size, so quality difference is not that big of a deal. But keep reading…
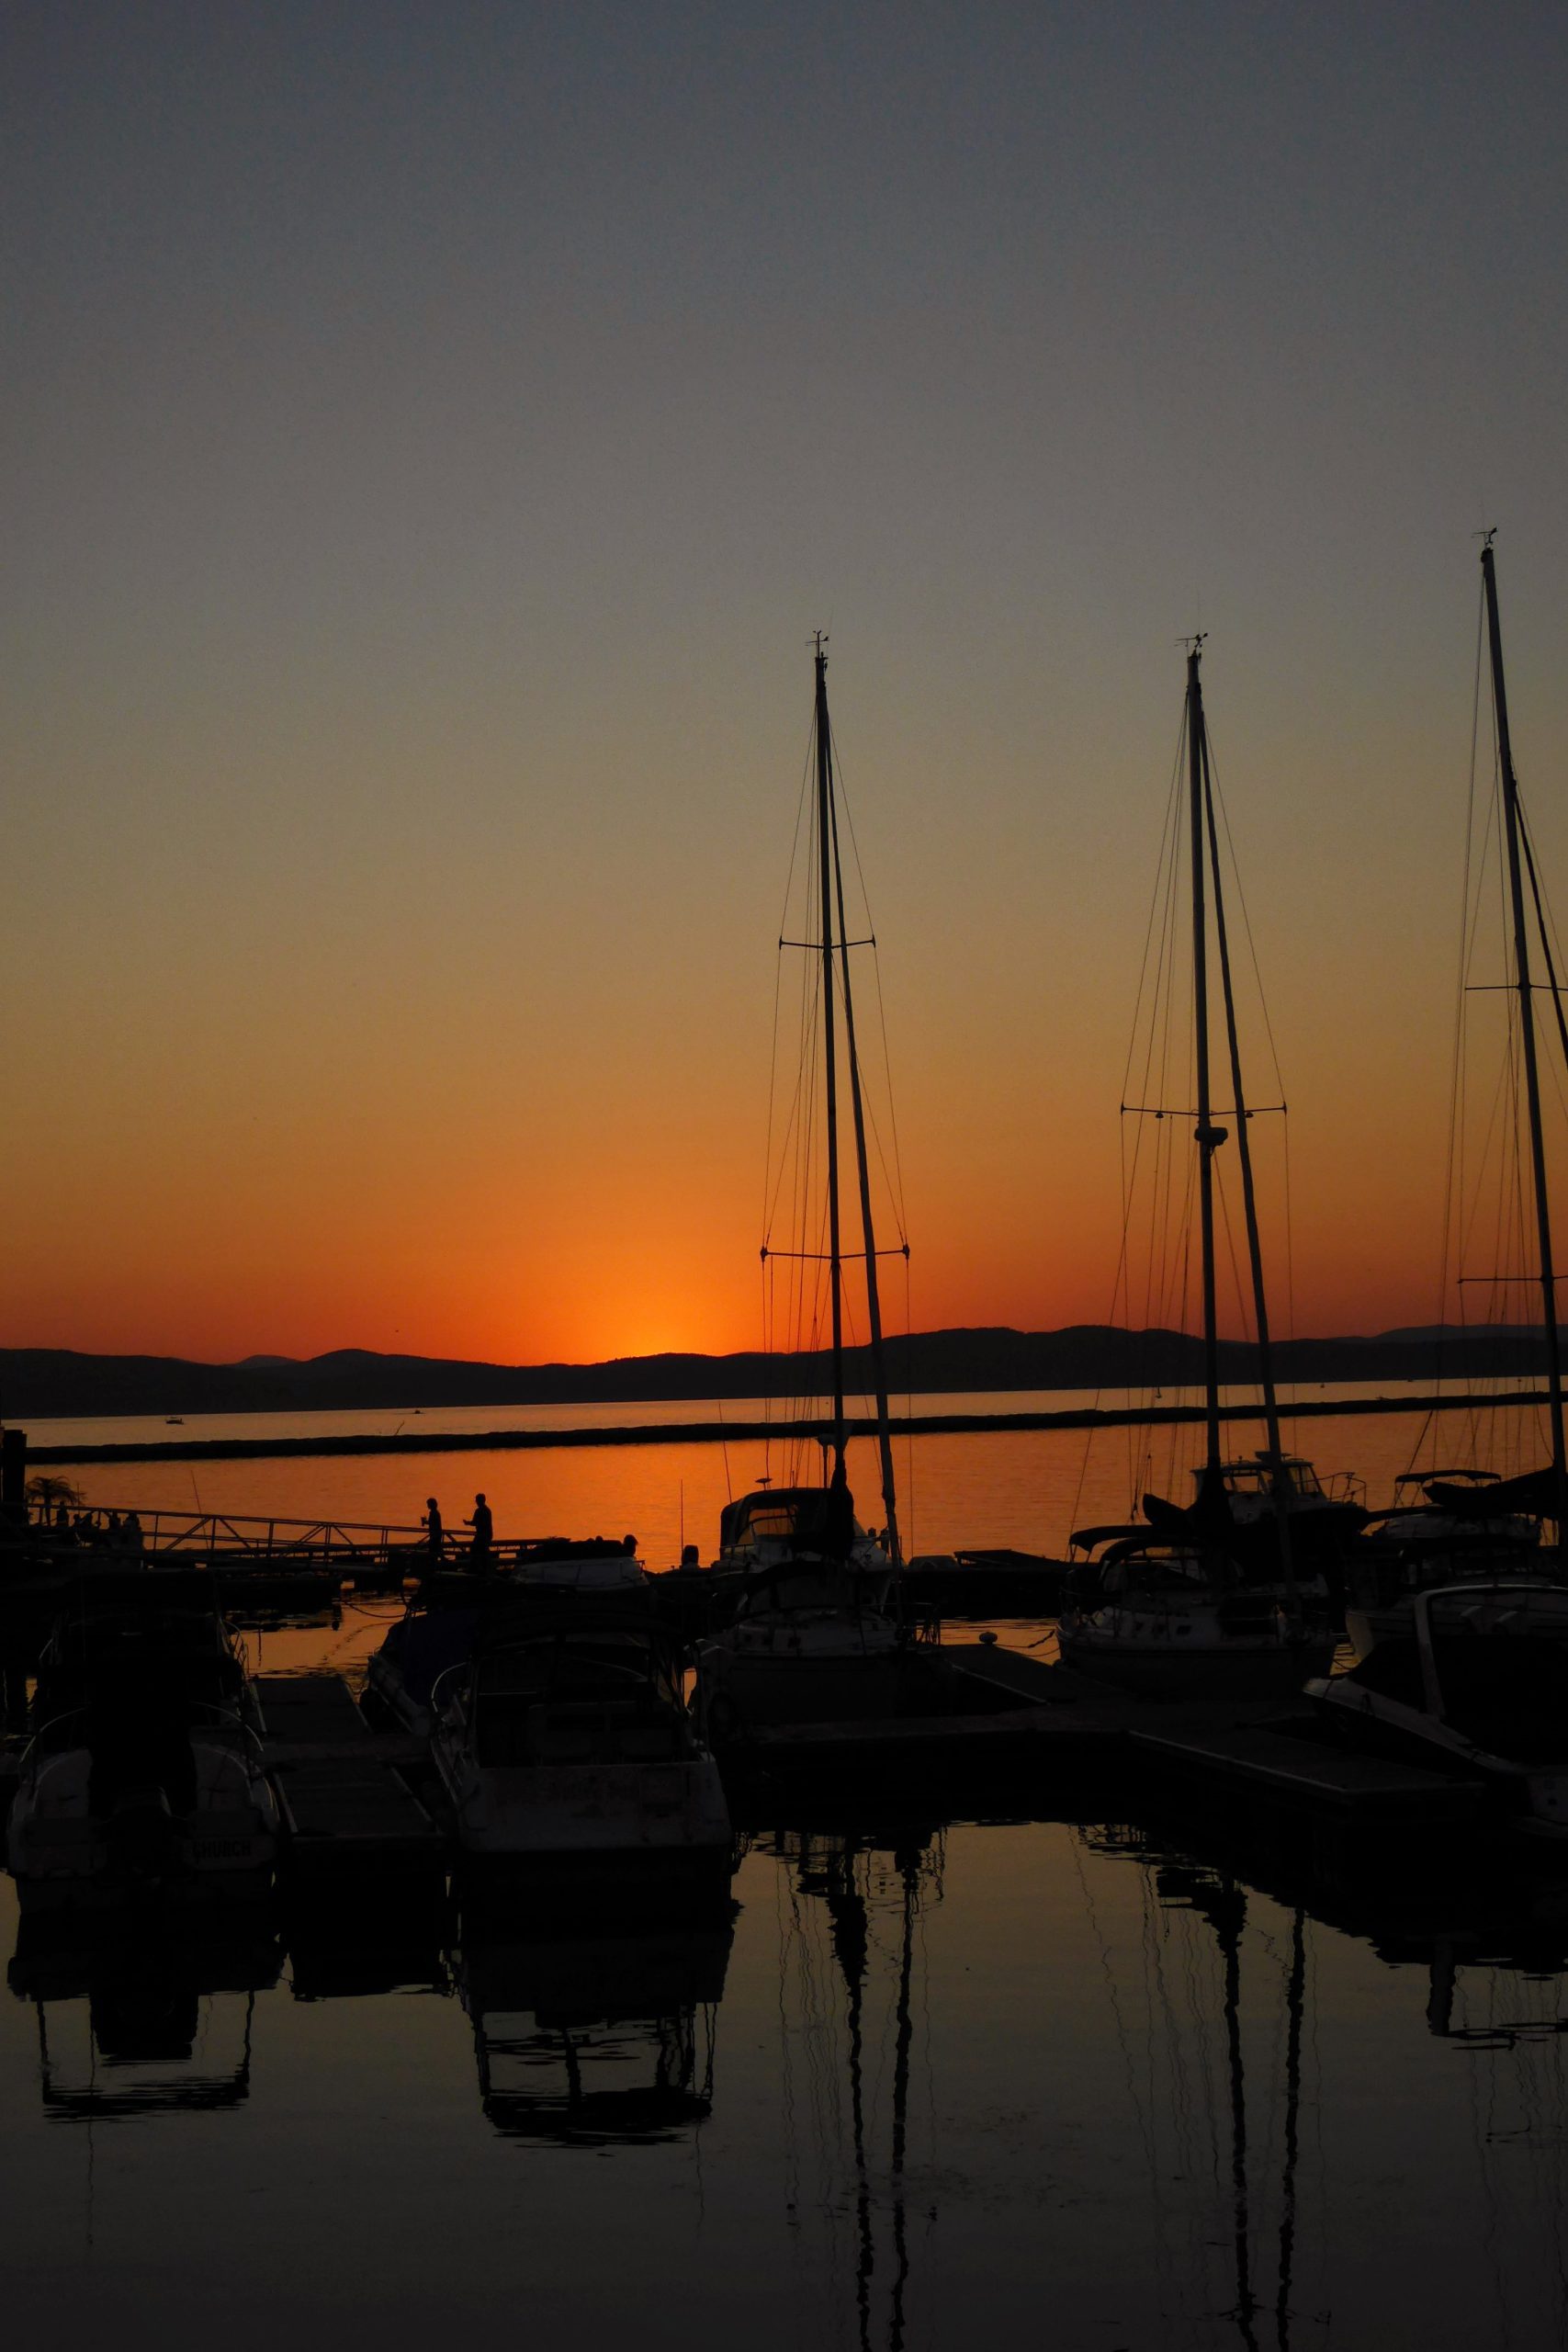
 *Digital noise is a major thing to think about when taking a picture regardless of what type of camera you use, but a compact always has a bigger problem. (This photo shows a lot of ‘noise’. See the mottled colors in the sky and water?) A good rule of thumb is to use the lowest practical ISO setting you can. The lower the ISO, the less ‘noise’ you’ll have. If it’s too low, then you’ll get a blurry shot because the shutter is moving too slow to handle camera shake. Experiment to see how low you can go. You might find that using a tripod and your camera’s timer will make a big difference.
*If you want to bring a subject in as far as possible, you will most likely need your tripod. If the light is low then the closer you bring your subject in with the telephoto, the more ‘noise’ you’ll have.
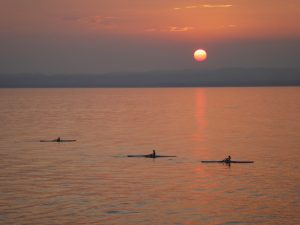
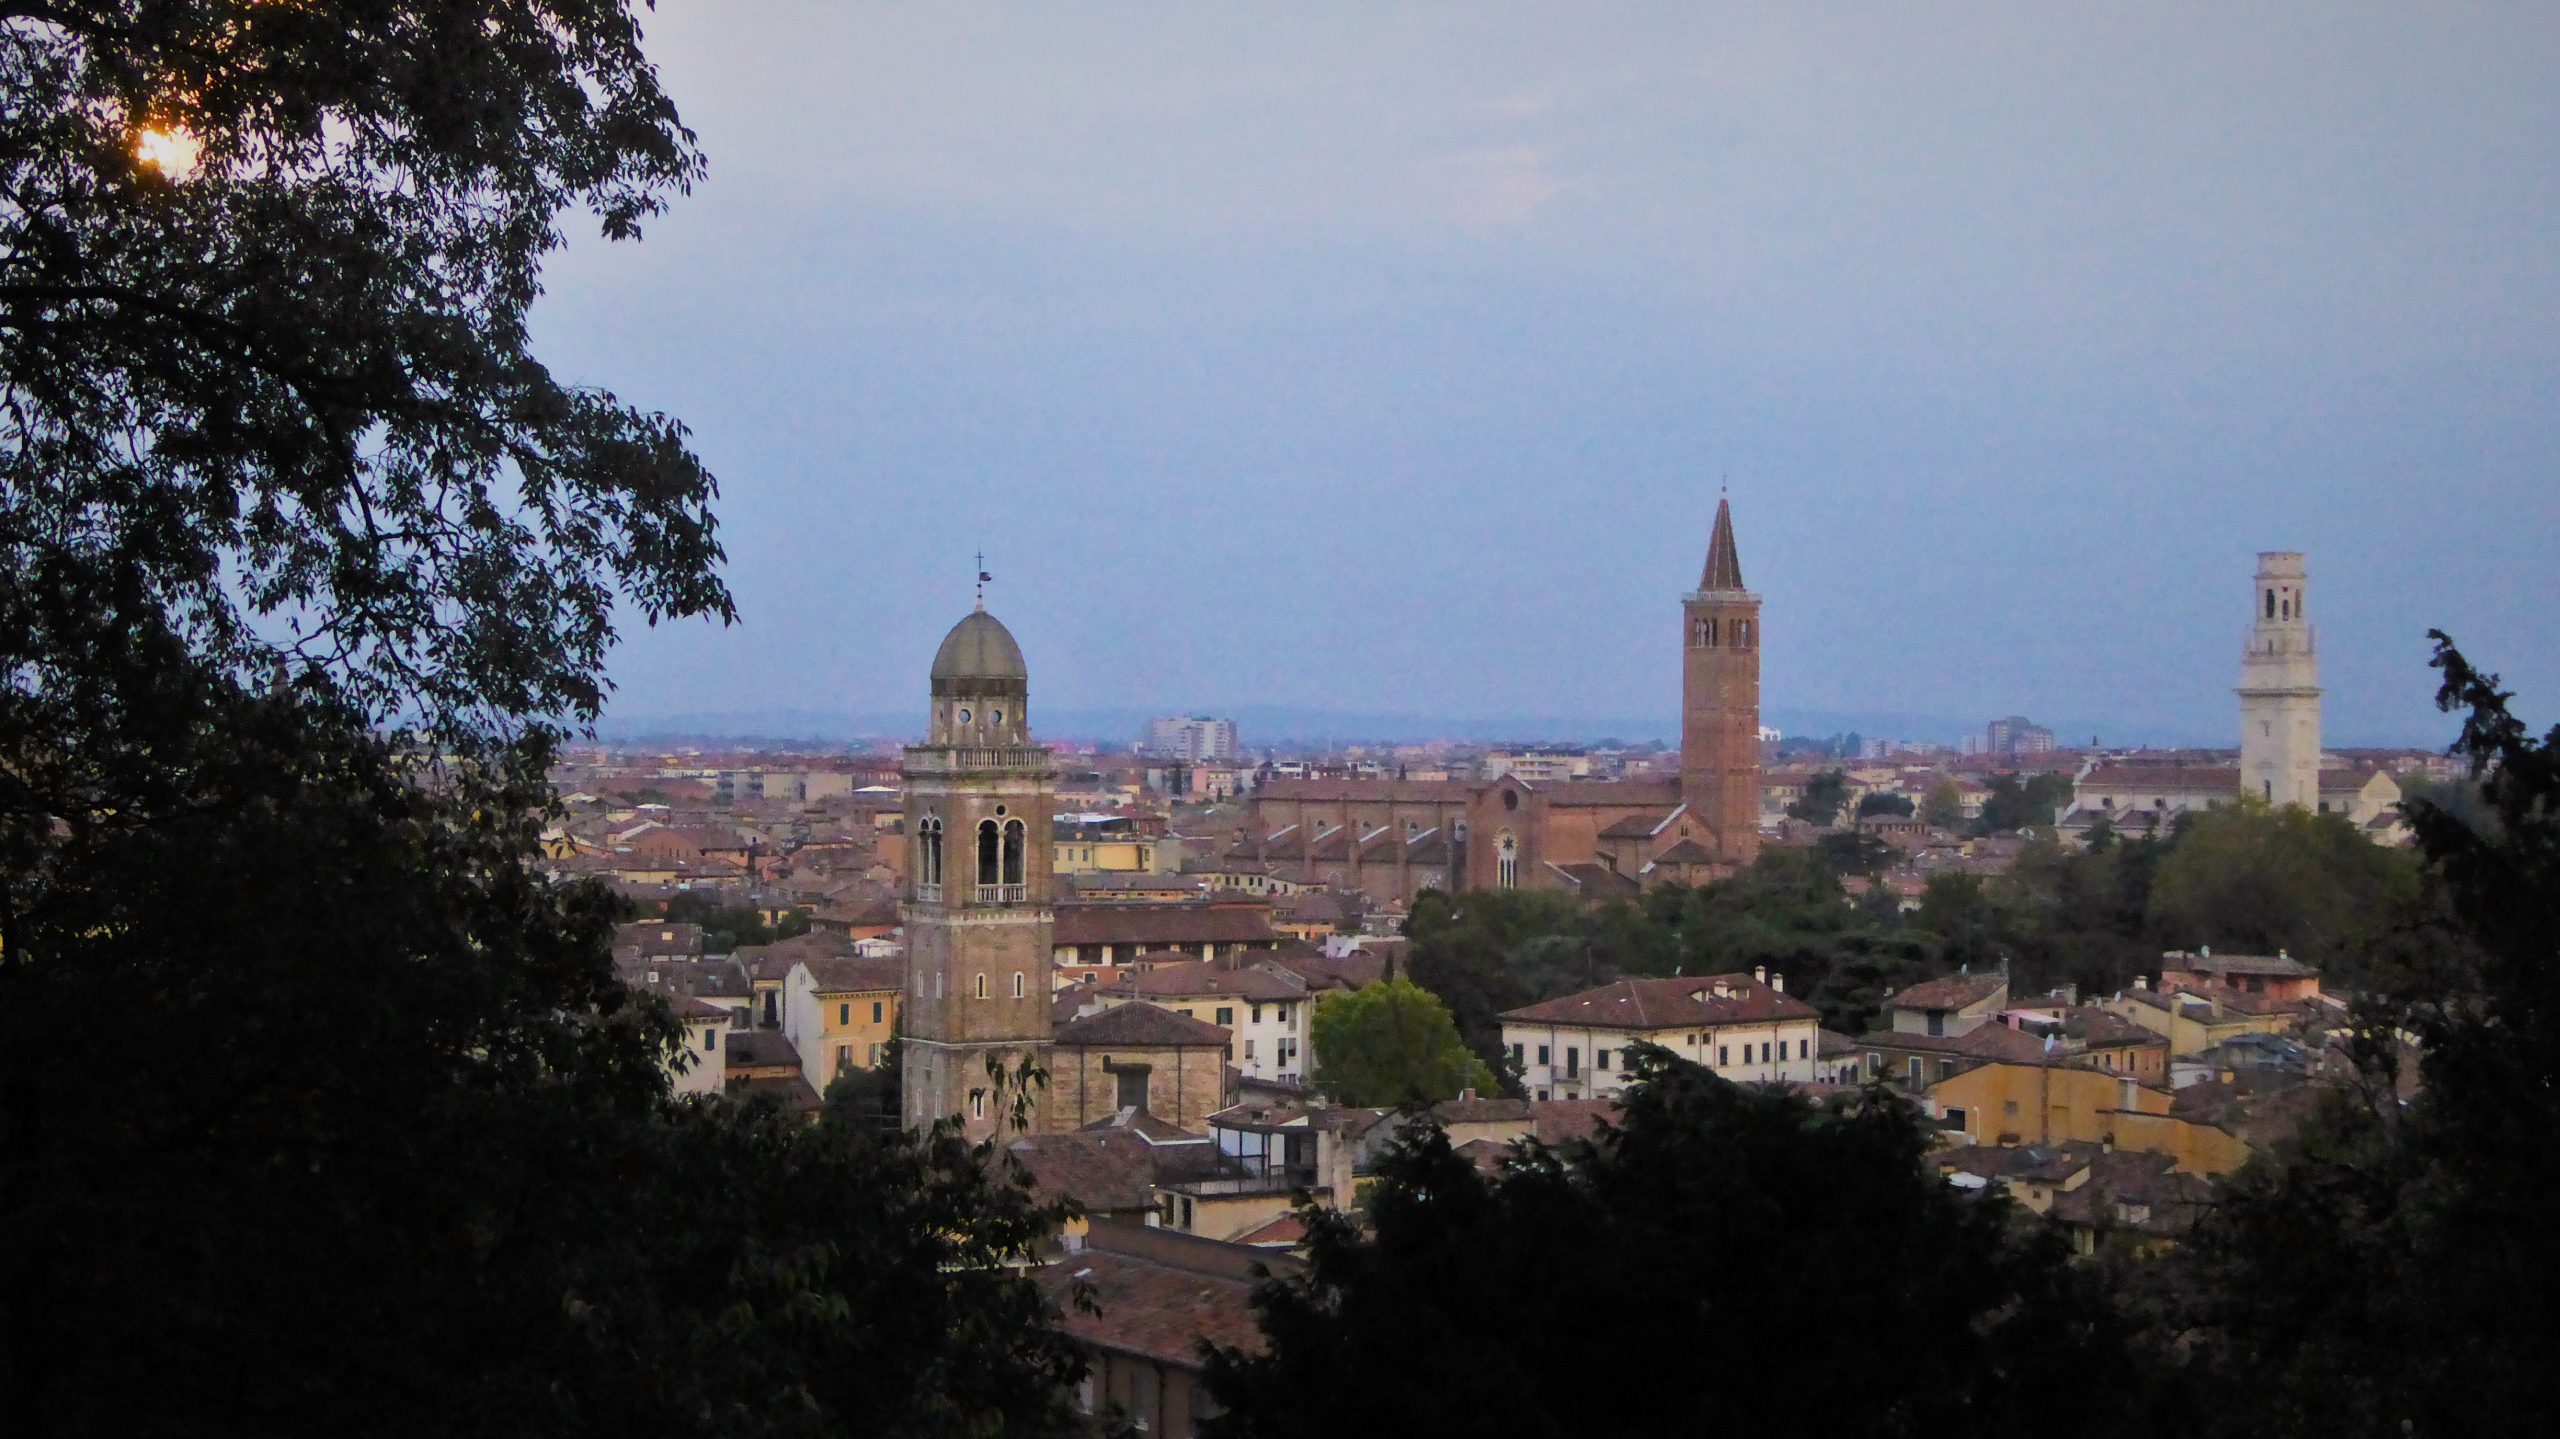
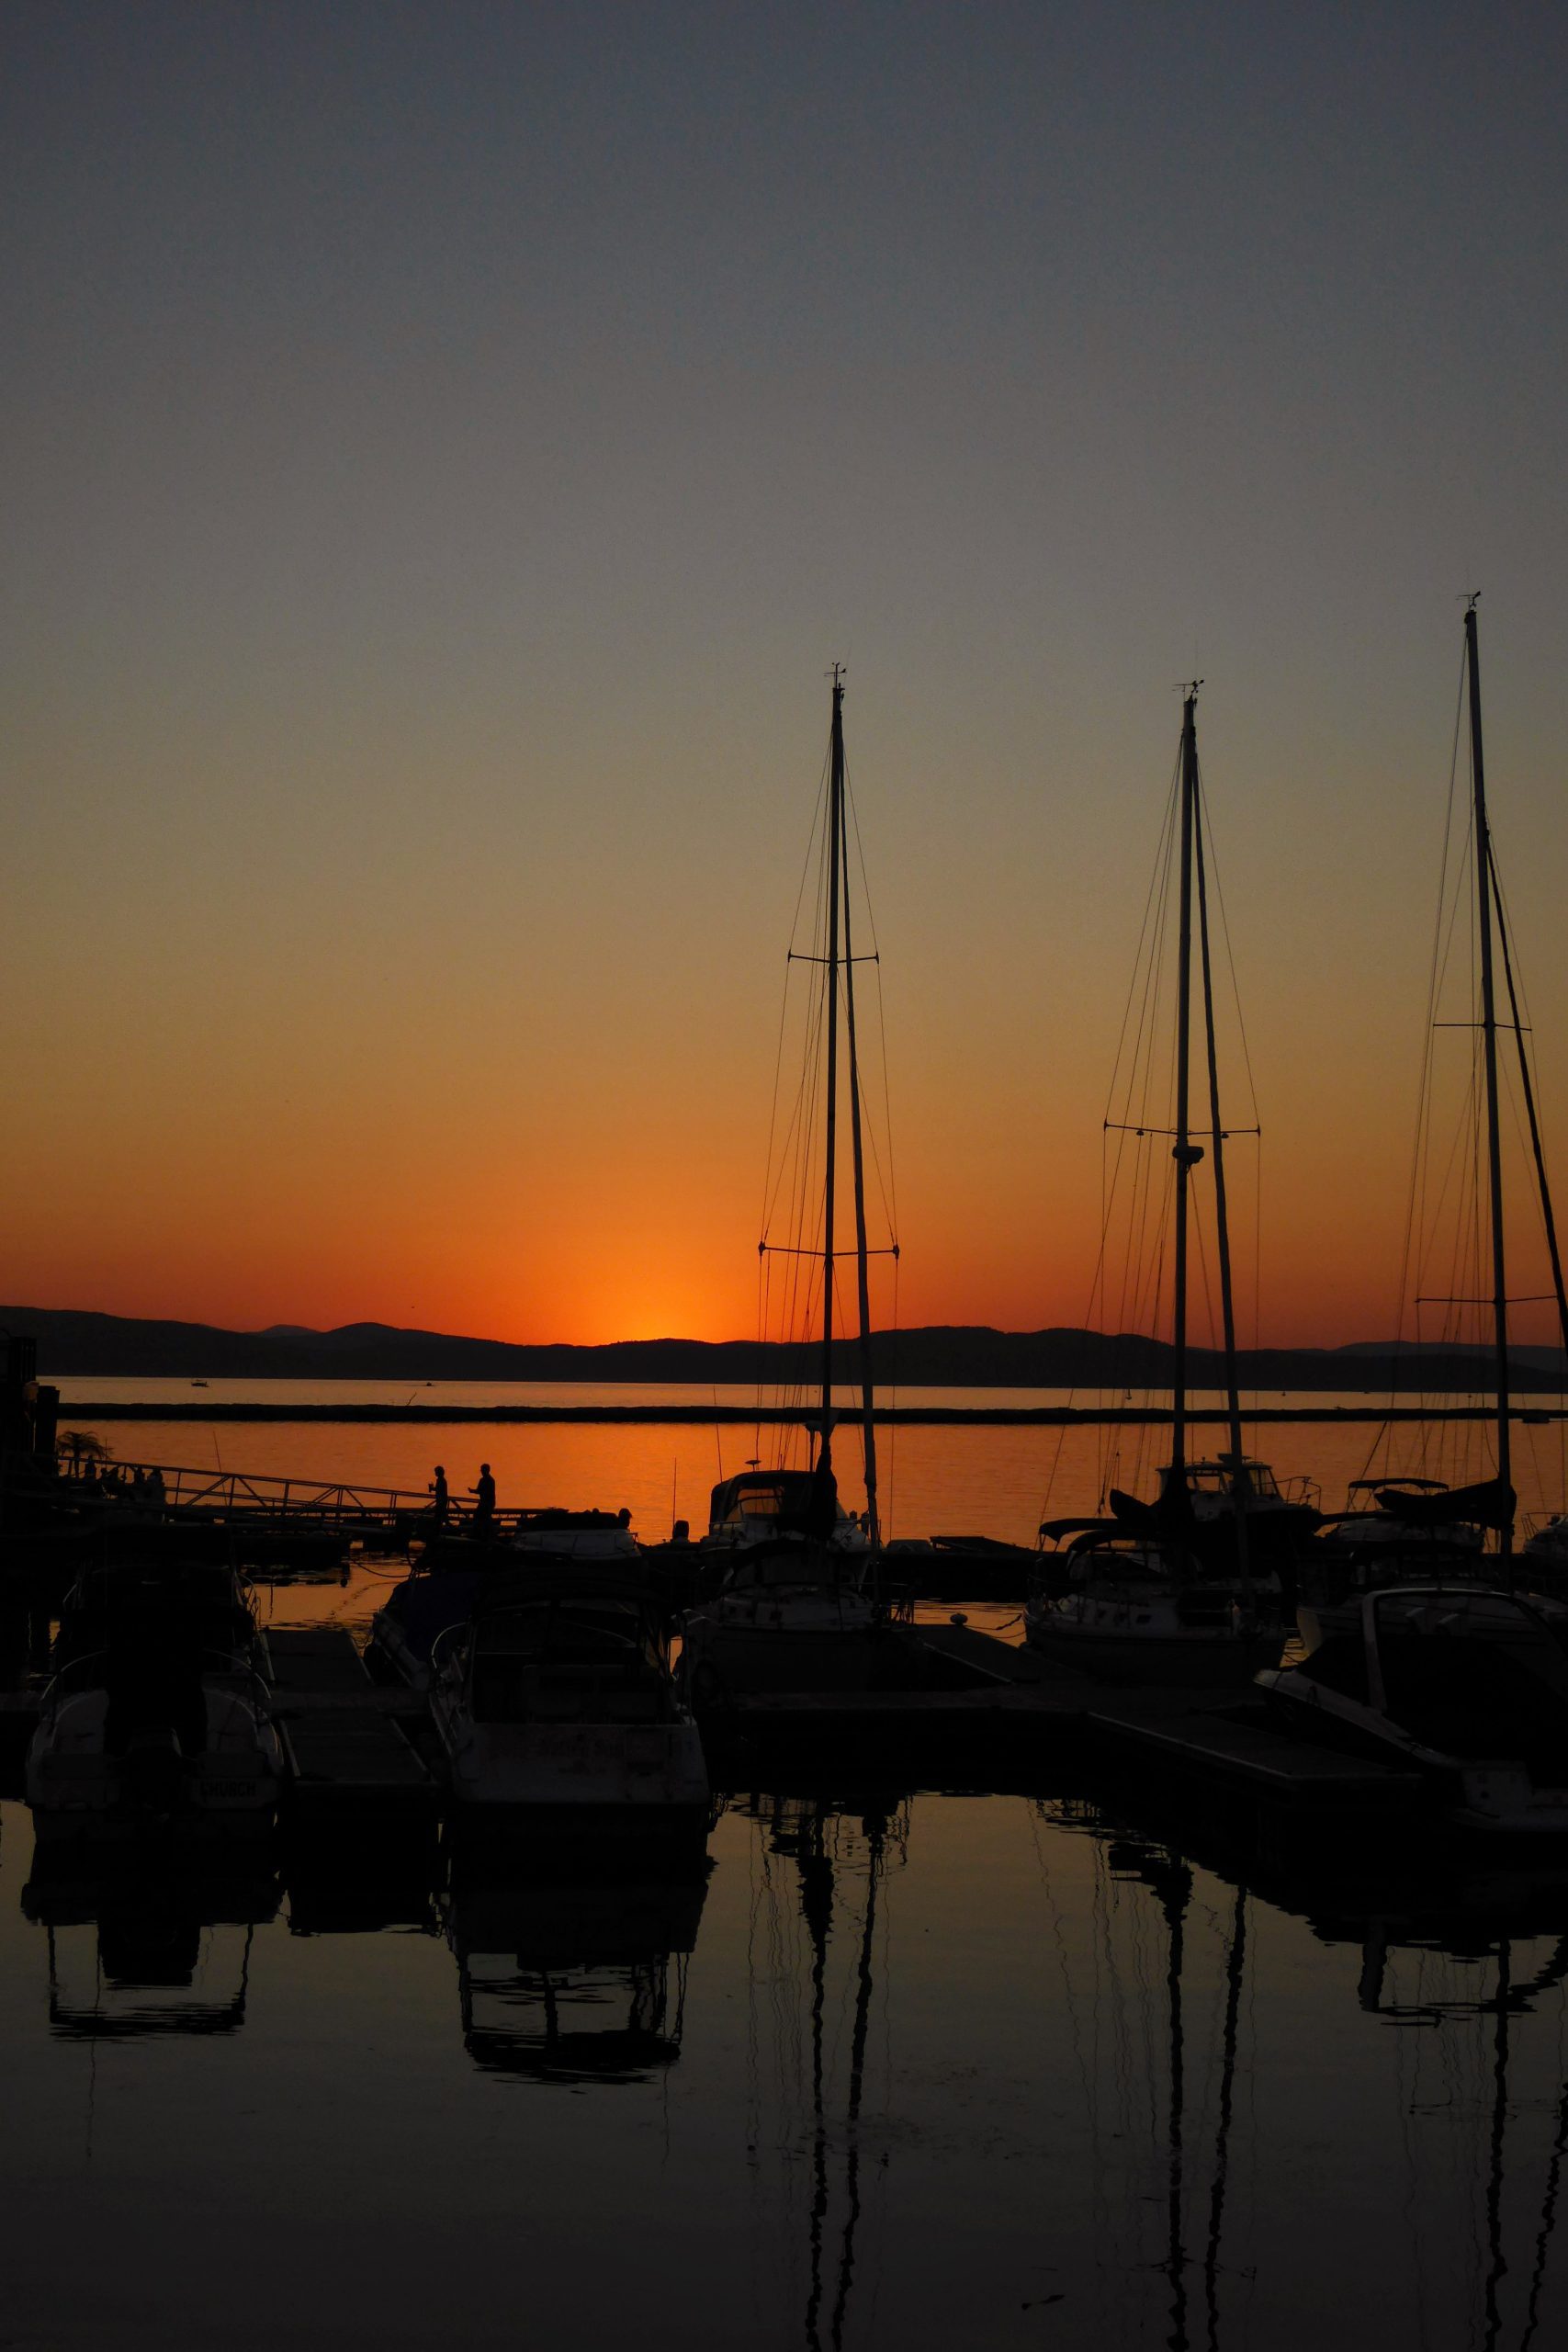
 *Sun & Moon photos will never look like what you can get with a DSLR.
But that’s ok if you know the limitations you have and make the most of the shot. You’ll need to avoid pulling the subject in too much. See how much nicer the 2nd shot is?
*Although you can get really close to a subject with a compact, there is a reason that the Macro lens was invented. It’s better to physically get close to your subject than try and use your telephoto for close up shots.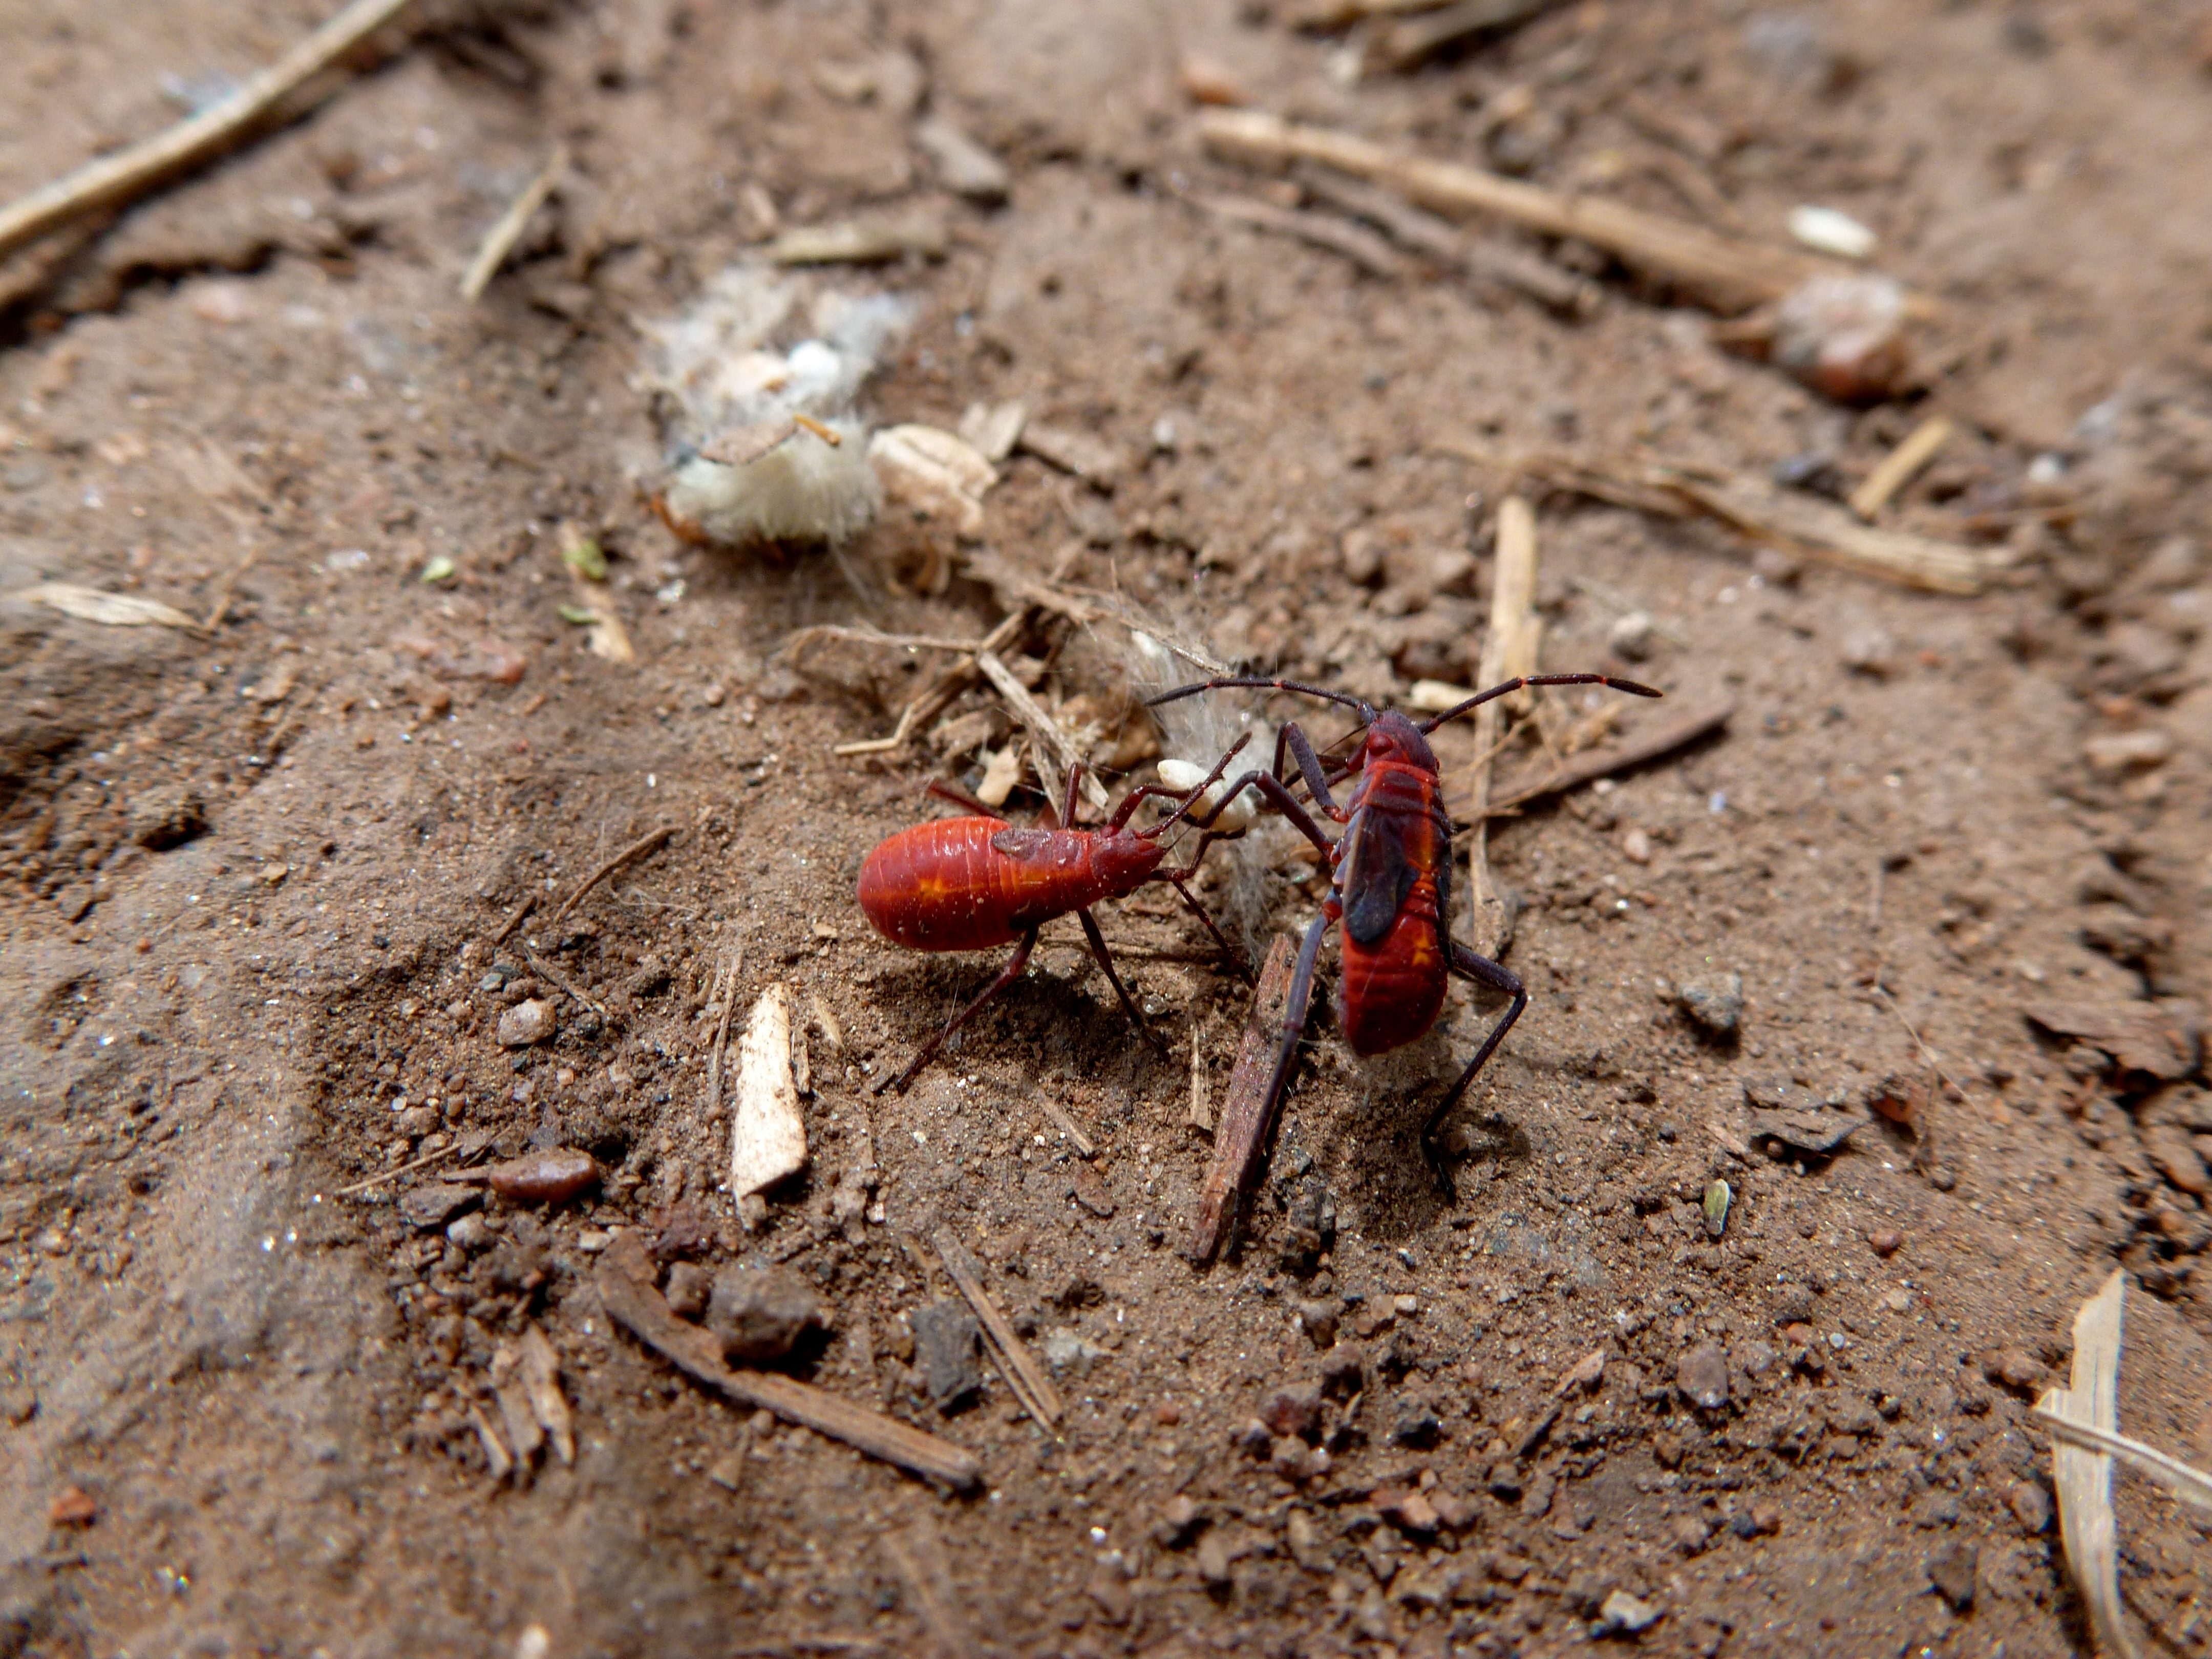
*Action Shots are a little harder with a compact. Use your ‘burst’ mode and keep the ISO high (400-800). Also, the further away you are, the better.
*Shutter lag (the time between you pushing the button and when the photo is actually taken) is one of the biggest complaints of compact users. (If your looking to purchase a camera, remember that the higher the price, the faster the shutter speed). Try and pre-plan and set up your photo shoots as much as you can.
Make sure to really read your manual and learn your particular camera’s limitations. Spend some time taking photos. Really focus on a subject or scene and take a mental picture. Then take the shot with your camera and evaluate what your eye sees compared to the camera’s eye. And make sure that you spend time working with your camera before you leave on a trip!
Remember, too that there are so many advantages of having a compact camera besides the convenience. They are fun, easy, creative and can get into small places. Even pros keep one handy!
2).UNDERSTAND LIGHTING BASICS:
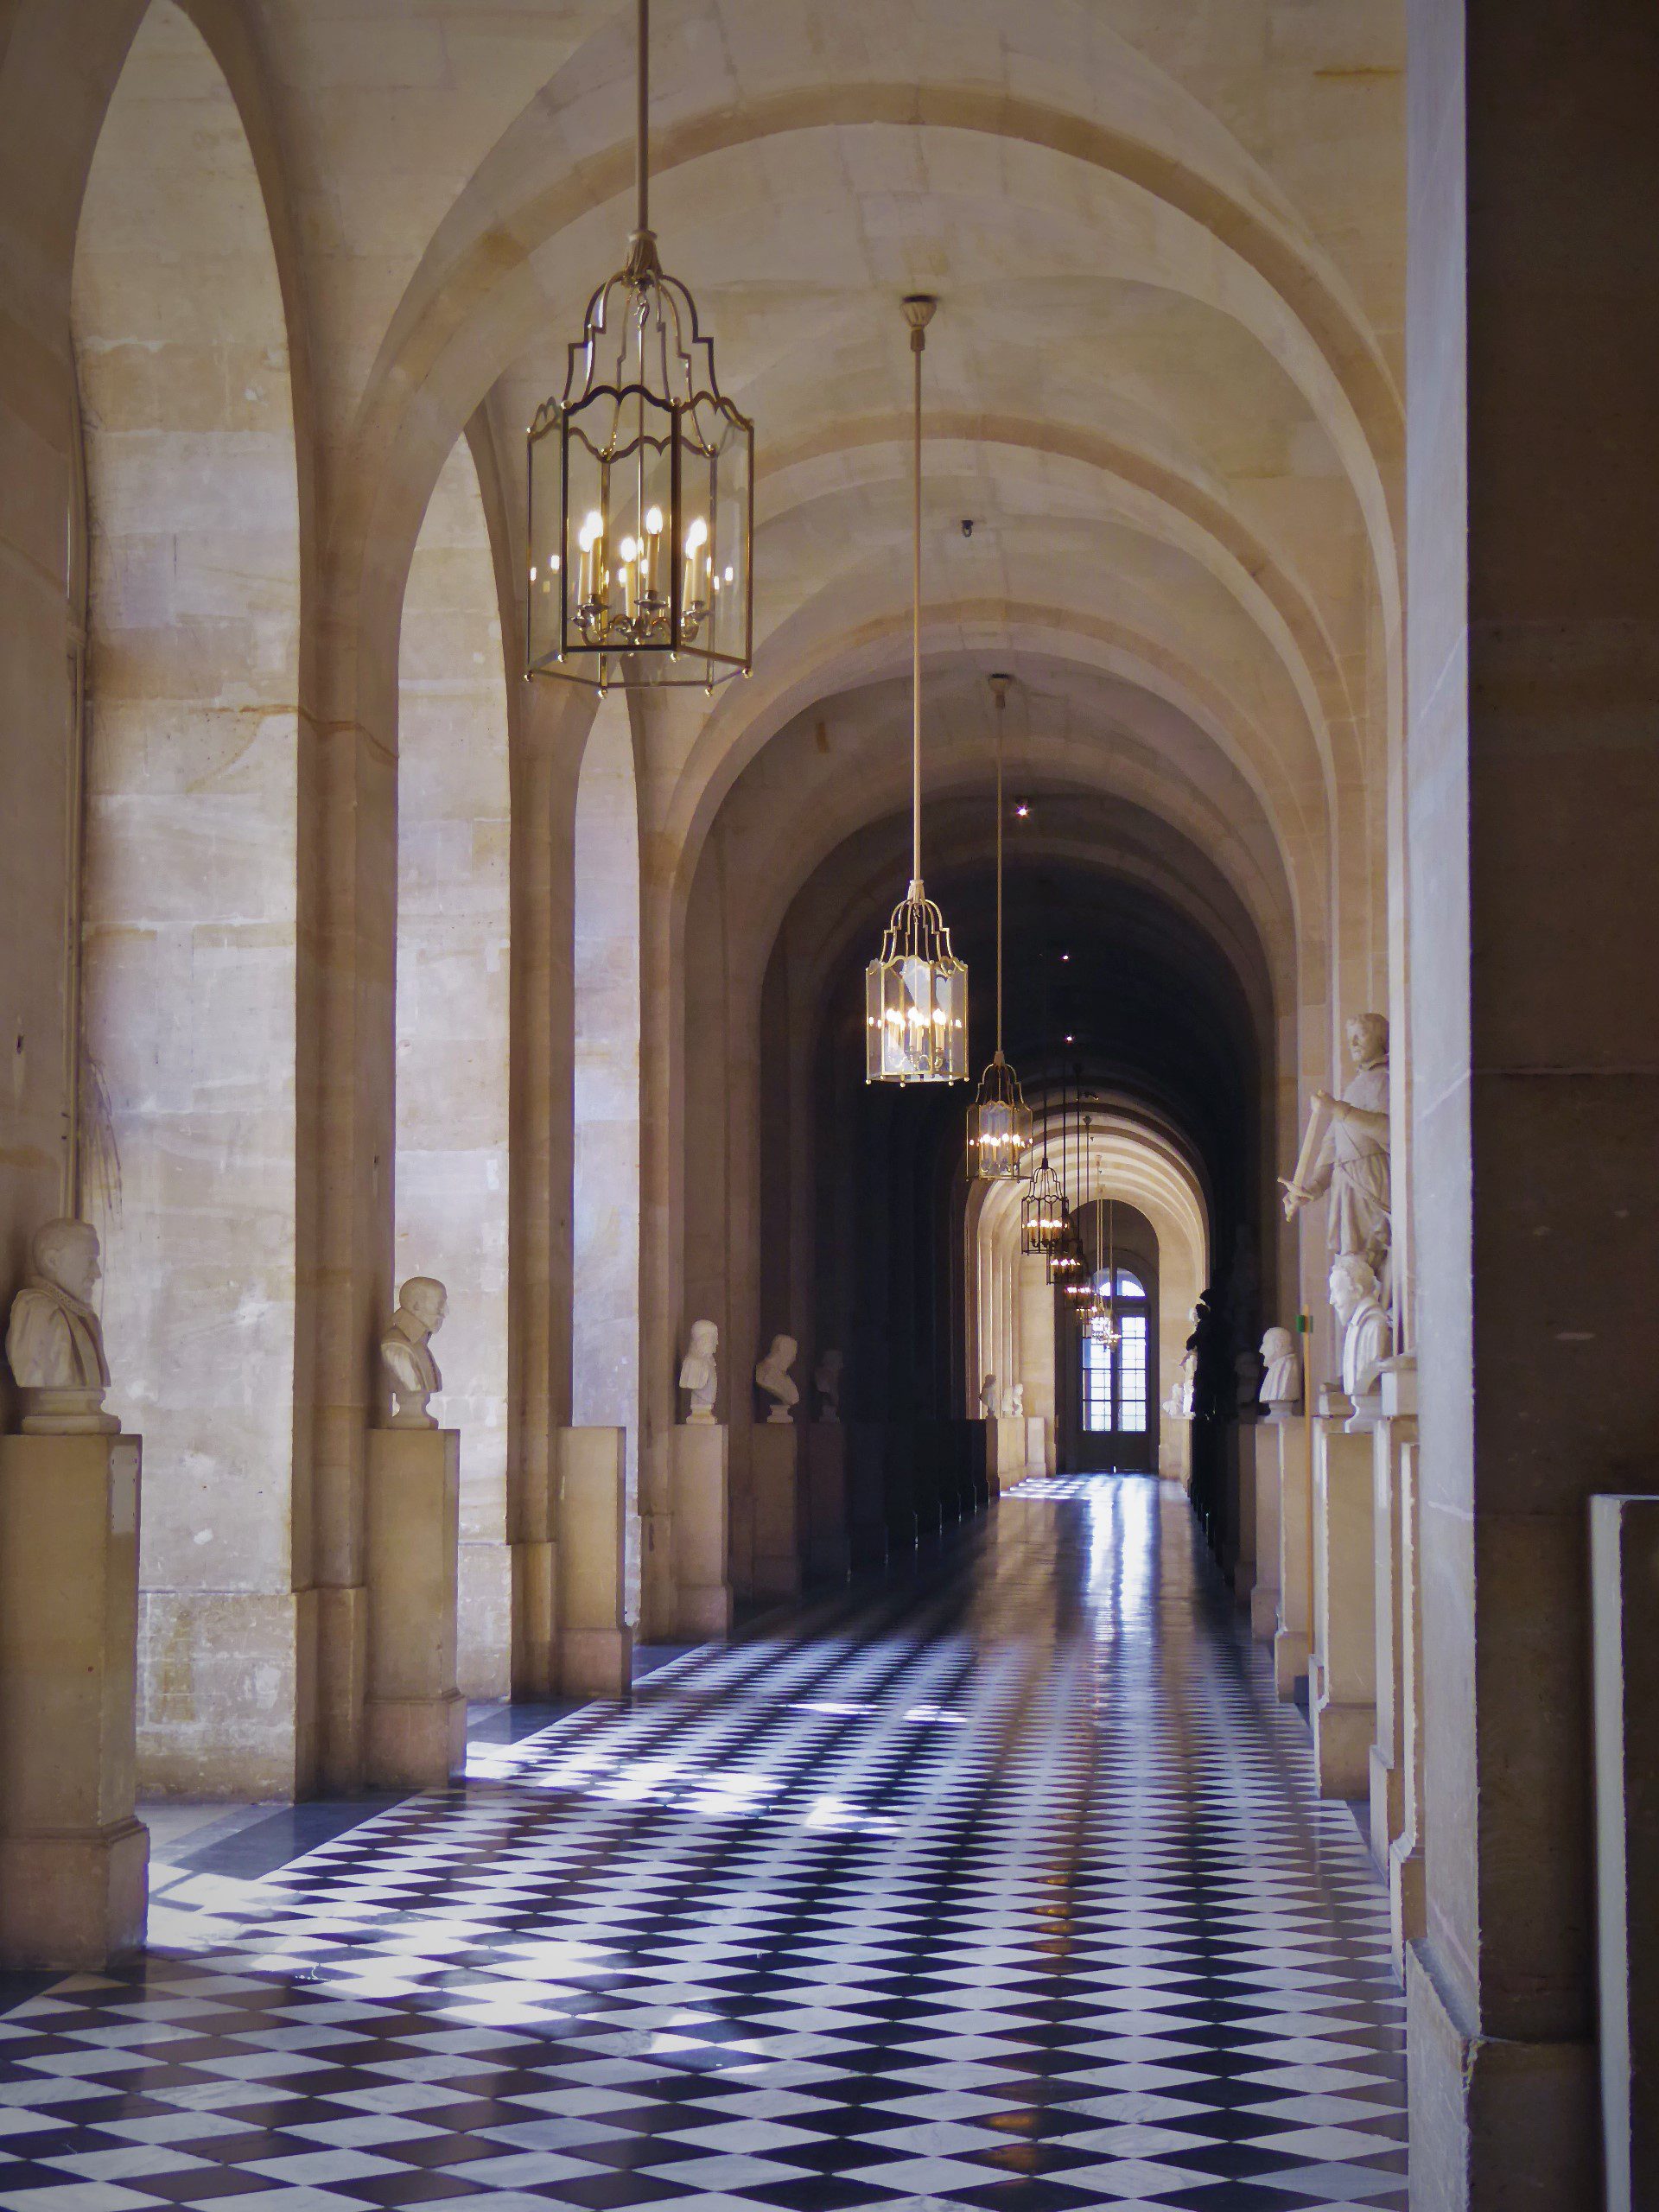
*Light is the compact camera user’s best friend. Our eyes have a brightness range equivalent to about 11 F-stops. Compact Cameras see only about 5 F-stops. Look for photo ops that have fairly low light-to-dark contrasts. Here’s what I mean:

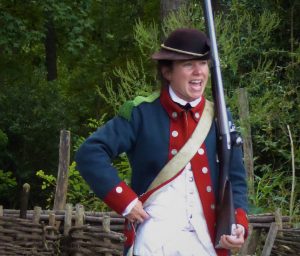
In this 1st photo, the contrast is stark and we lose this soldier’s eyes and half of his face and hat, while the 2nd one shows a full-featured face.
*Set the ISO low when shooting in bright conditions, and higher when shooting in lower light. The lower the light, the more you’ll need a tripod. Check out a ‘Gorilla’ tripod for compact cameras.
*Get to know your camera’s EV (exposure compensation) control when your shooting in the Automatic mode. It’s usually a button or wheel with a +/- symbol. Here you can increase or decrease the light to avoid under/over exposure. Roll toward the + setting if your at the beach on a sunny day, or in bright snow. Roll toward the – if you need to increase your lighting, say, if your photographing a person’s face and there are too many shadows.
*Remember that light has Color. Maximize the ‘Golden Hours’ (just after sunrise and just before sunset) to create images with a warm hue. During the day, be sensitive to the color of light and make the most of it. You can control the color of light by using your White Balance adjustment setting. White Balance tells the camera how white you want your whites, and then the other colors record properly. Play with your settings to see what I mean. Look for the Sunny (or Daylight), Florescent, Tungsten, Shade, Overcast etc.. settings.
*Light has Direction. Be aware of where your light is coming from and make proper adjustments – usually where you are standing and the angle that your holding your camera in.
It’s usually easy to see which direction the light is coming from, so use it to your advantage.
*Light has Quality. Poor quality light will produce poor quality photos. Look to shoot your photos in the earlier and later parts of the day, and in dramatic weather situations like fog, mist, intense clouds and skies. If you need to take photos in the middle of the day because, well, your on a road trip, then make the best use of your Rules for Watching Shadows, and make sure your shots are fun and memorable.
*Light also Moves. Light moves when it reflects off of a moving subject, such as your kiddo playing soccer or at a dance recital, a waterfall, and everything I take out of my car window because Eddie is tired of stopping for ‘photo ops’. You control the outcome with your Shutter Speed. Use the ‘Burst’ setting (which usually has a picture of multiple squares), and don’t use too much telephoto. For a dramatic effect set your ISO low, use a tripod and the camera’s timer.
3). LEARN YOUR MODE SETTINGS:
*If you look on your camera’s dial you’ll see a SCN option. Here’s where you can let your camera know the kind of situation that you are in (nighttime, bright light, landscape, sports etc…). Play around with these options as they can help you maximize your circumstances.
*On that same dial you’ll (generally – depending on your camera) see an artistic setting option. Its most likely identified with an artist’s paint palette. This is a really fun setting with a number of artistist options that give you lots of creative ideas. Pick one subject and then see what each of the different effects look like with your subject. This is a great tool to be proficient with, especially for those midday boring-light photos!
4). KNOW YOUR RULES OF COMPOSITION:
*This subject is covered in greater detail in the blog, BASIC PHOTO COMPOSITION TIPS, but for now just remember these things:
–Rule of 3rds: See your screen divided into 9 windows. Put your main subject in 1-3 of those windows, but not in the center.
-Keep the horizon line straight
-Have an identifiable subject of each photo
-Try to avoid backgrounds that are too busy or distracting
-Put something or someone in a photo to show perspective if your doing landscape or buildings.
-Watch your shadows – especially with photos of people. Midday sun can really create ‘racoon eyes’
-Have Fun, Know your camera & be Creative!
5). LEARN SOME BASIC PHOTOSHOP SKILLS:
Every computer as well as most laptops & tablets have a photo program. The names are different depending on your device and it’s version. However, here are a few elements of any program that you should know how to utilize. Upload any photo to your device, open with the photo program, and get to know the buttons. It’s amazing how you can turn a so-so (or even blah) photo into a work of art. So play around and get to know your (always user friendly) built in program. You can always purchase a photoshop program, but that’s for another blog…or…actual Class.
*Crop: This allows you to make your subject larger and get rid of 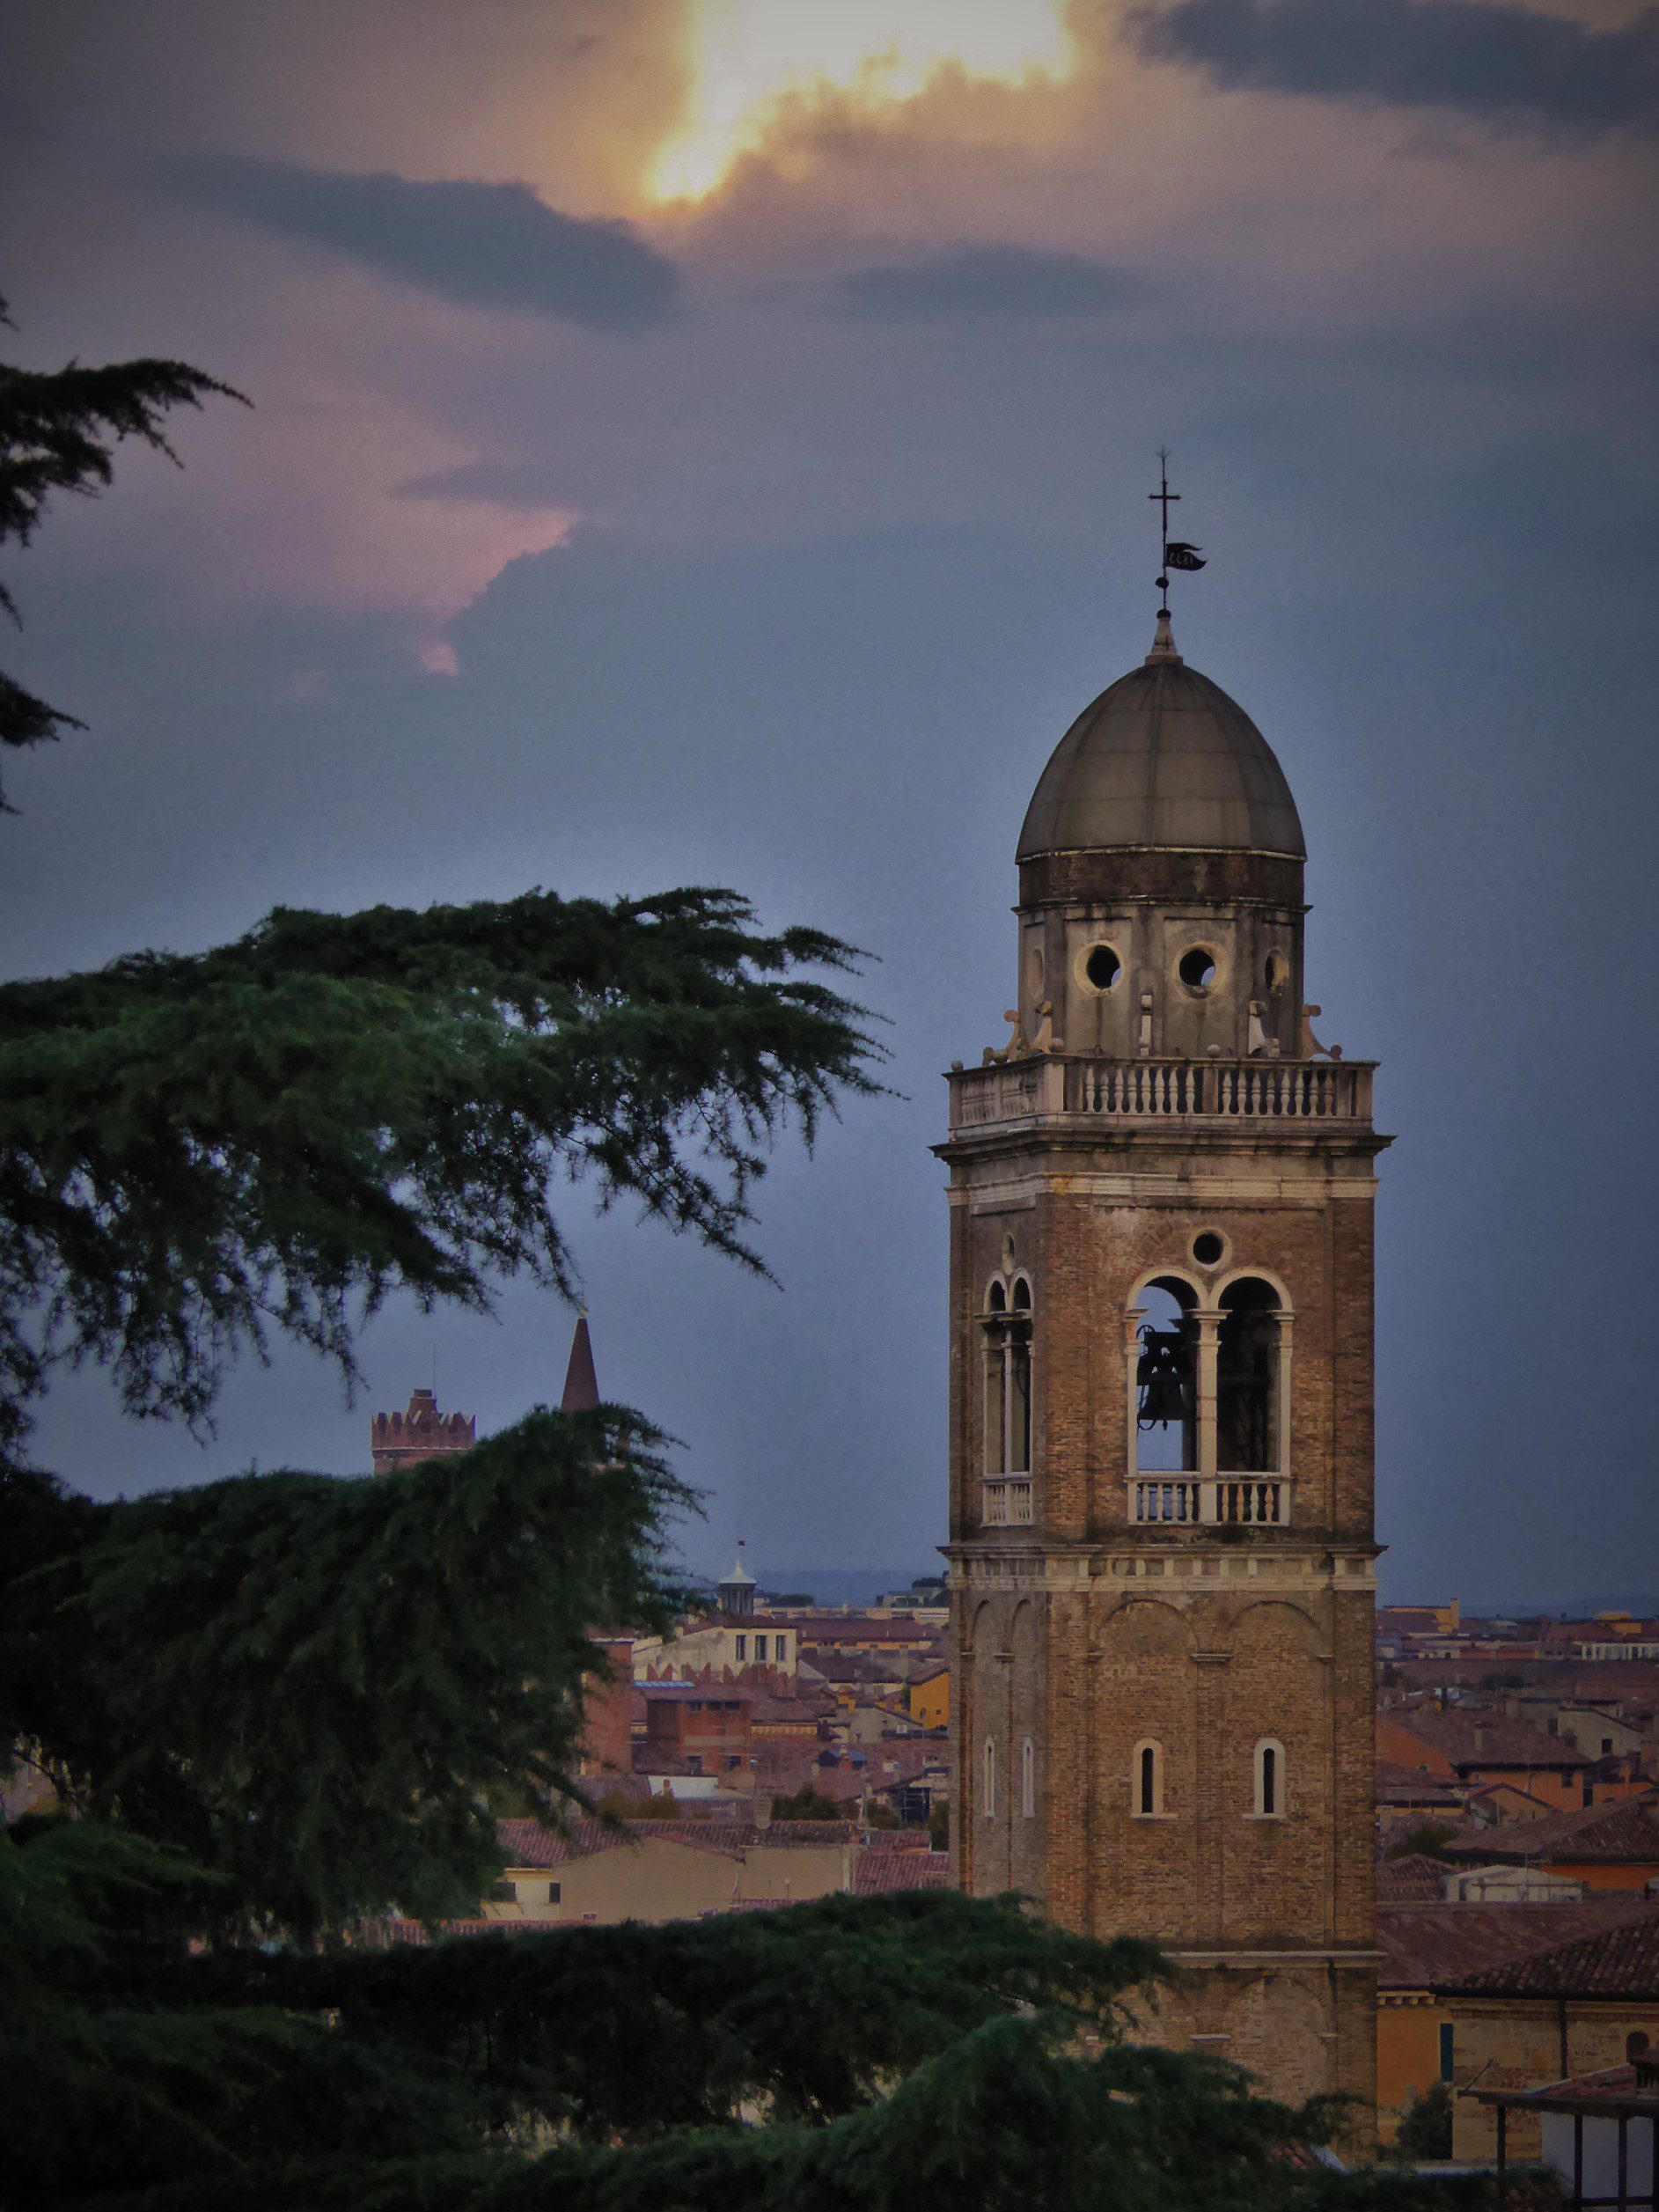 busy background
*Straighten: Is where you fix that crooked horizon line
*Red Eye: This one’s a no-brainer
*Light: Where you’ll find the buttons that allow you to lighten or darken, contrast (make the difference between the lights and darks more intense), and bring out or soften your shadows and highlights.
*Color: These buttons give you control of the temperature (warm or cool) and the tint. You can also saturate your colors and make the photo pop.
*Effects: To get a little more creative check out your effects options. You can put a vignette (darker edges) around the photo or even blur the edges.
Pick a few photos and play with all the options to become good at some simple and basic photoshop techniques. They can make all the difference!
Well, we’re off to a good start. the more you work with your camera, the more you’ll know just how far you’ll want to go. Despite my initial opposition, I have gone ahead and invested in a DSLR and a few lenses. No matter what I learn, though, or how proficient I become with my new ‘toys’, I will ALWAYS have with me my little Lumix Point-and-Shoot camera.
If you are in the markets for any kind of camera, make sure to talk to a knowledgeable  salesperson and get help with making an informed decision!
To Get to the Homepage of this Website, Click HERE and don’t forget to subscribe and leave a comment!
HOW TO NAVIGATE THIS WEBSITE CLICK HERE
I’m sharing with my phototaker daughter. Such good detail.
Great article. These tips will help a lot! Thank you!